
If you’ve ever stumbled upon a snack that instantly makes you feel cozy and a little bit fancy, you know the magic I’m talking about. For me, that snack is Crocolini. The first time I tried these delightful, twisted sticks of pastry, I was hooked. They have a satisfying crunch, a rich, buttery flavor, and just the right amount of sweetness or savory kick, depending on how you make them. It’s a snack that feels special but, as I quickly learned, is surprisingly easy to create right in your own kitchen.
In 2026, we’re all looking for ways to bring more joy and simplicity into our homes. We want recipes that are versatile, made with ingredients we can trust, and perfect for sharing with friends and family. This homemade Crocolini recipe checks all those boxes. It’s more than just a snack; it’s an activity. It’s the smell of pastry baking in the oven, the fun of twisting the dough, and the pride of serving something you made from scratch.
In this guide, I’ll walk you through everything you need to know to master homemade Crocolini. You will learn:
- The essential ingredients required for the perfect batch.
- A detailed, step-by-step process that’s easy to follow.
- My personal tips to ensure your first try is a success.
- Creative variations to customize the flavor to your liking.
Quick Overview
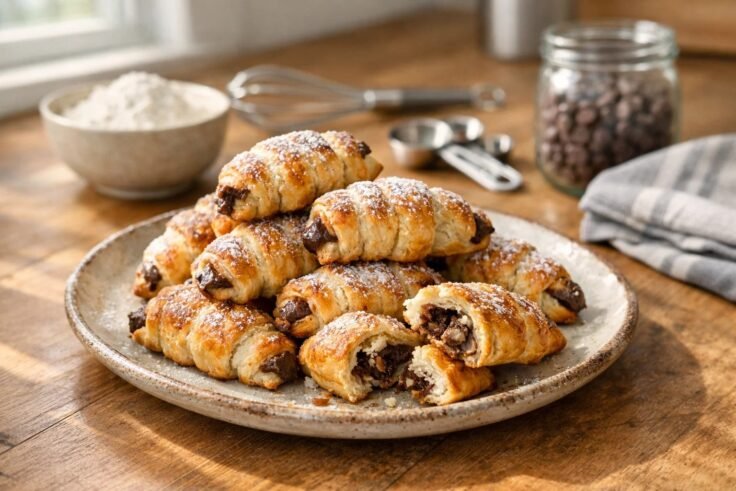
Crocolini are twisted, stick-shaped pastries made from puff pastry dough. They can be prepared as a sweet snack, often dusted with sugar and cinnamon, or as a savory appetizer with cheese and herbs. Baked until golden brown and flaky, they are known for their distinctive crunch and versatile flavor profiles.
Table of Contents
- Introduction to Crocolini
- Crocolini Ingredients You’ll Need
- Step-by-Step Crocolini Recipe
- Crocolini Cooking Tips for Beginners
- Crocolini Variations and Flavor Ideas
- Crocolini as a Snack or Dessert
- Common Mistakes to Avoid When Making Crocolini
- Homemade vs. Store-Bought Crocolini
- Real-Life Experiences: Crocolini at Home
- Pros and Cons of Making Crocolini at Home
- Crocolini Storage and Shelf Life
- Conclusion
- FAQ
Introduction to Crocolini
So, what exactly is a Crocolini? Think of it as the elegant cousin of a breadstick. It’s made from puff pastry, which gives it hundreds of light, flaky layers. When baked, it puffs up and becomes incredibly airy and crisp. The name itself sounds fun and sophisticated, which perfectly matches the experience of eating one. They often come in sweet versions, like cinnamon sugar, or savory styles, perhaps with Parmesan cheese and garlic.
Their origin is a bit of a mystery, but they share similarities with Italian grissini (breadsticks) and French pastry techniques. What makes Crocolini stand out is the use of puff pastry instead of a standard bread dough. This simple swap transforms a basic breadstick into a delicate, buttery, and utterly addictive treat.
From my experience, their appeal lies in their simplicity and versatility. They are just as fitting alongside a morning coffee as they are served with a dip at a dinner party. Making them at home demystifies the process and lets you control the quality of the ingredients, which is something I value more and more.
Crocolini Ingredients You’ll Need
One of the best things about making Crocolini is that you don’t need a long list of complicated ingredients. In fact, you might already have most of what you need. I always recommend using the best quality ingredients you can find, especially for the puff pastry, as it’s the star of the show.
Here’s a basic list of what I use for a classic sweet Crocolini:
- Puff Pastry: You can absolutely make your own, but a good-quality, all-butter store-bought puff pastry sheet works wonders and saves a ton of time. I look for brands that use real butter for the best flavor and flakiness.
- Melted Butter: This helps the toppings stick to the pastry and adds an extra layer of richness. I prefer using unsalted butter so I can control the overall saltiness.
- Granulated Sugar: For that classic sweet crunch. You can also use brown sugar for a deeper, more caramel-like flavor.
- Cinnamon: A warm spice that pairs beautifully with the buttery pastry.
- Large Egg: For an egg wash. This is my secret to getting that perfect, shiny, golden-brown finish. It also helps the toppings adhere.
- A Pinch of Salt: Just a little bit to enhance all the other flavors.
For savory versions, you’d swap the sugar and cinnamon for things like finely grated Parmesan cheese, garlic powder, dried herbs (like rosemary or thyme), or even everything bagel seasoning. The core ingredients—puff pastry and butter—remain the same.
Step-by-Step Crocolini Recipe
Ready to make your own batch? Here is the step-by-step method I’ve perfected over time. Don’t be intimidated by the twists; once you do one or two, you’ll get the hang of it quickly. It’s actually quite a relaxing process.
Prep Time: 15 minutes
Cook Time: 12–15 minutes
Total Time: About 30 minutes
Yields: 16–20 sticks
Here’s how I do it:
- Preheat and Prepare: First things first, preheat your oven to 400°F (200°C). Line a large baking sheet with parchment paper. This prevents the Crocolini from sticking and makes cleanup a breeze.
- Unroll the Dough: Carefully unroll your thawed puff pastry sheet onto a lightly floured surface. If it’s not perfectly rectangular, you can gently roll it to even it out. I aim for a rectangle that’s roughly 10×12 inches.
- Apply the Toppings: Brush the entire surface of the pastry with melted butter. In a small bowl, mix your granulated sugar and cinnamon. Sprinkle this mixture evenly over one half of the buttered pastry.
- Fold and Press: Fold the plain half of the pastry over the half with the sugar mixture. Gently press it down with your hands or a rolling pin to seal the two layers together.
- Create the Egg Wash: In another small bowl, whisk the egg with a tablespoon of water. Brush this egg wash over the entire top surface of the folded pastry. This is what gives the Crocolini that beautiful sheen.
- Cut the Strips: Using a pizza cutter or a sharp knife, cut the dough into strips about 1/2 to 3/4 of an inch wide. A pizza cutter is my tool of choice because it glides through the dough so smoothly.
- Twist and Place: Now for the fun part! Pick up one strip, hold it at both ends, and twist it a few times. Don’t twist too tightly, or it won’t puff up as well. Place the twisted strip onto your prepared baking sheet. Repeat with the remaining strips, leaving a little space between each one.
- Bake to Perfection: Bake for 12–15 minutes, or until the Crocolini are puffed, golden brown, and crisp. I always keep a close eye on them during the last few minutes, as the sugar can cause them to brown quickly.
- Cool and Enjoy: Let them cool on the baking sheet for a few minutes before transferring them to a wire rack to cool completely. They are delicious warm but will get crispier as they cool.
Crocolini Cooking Tips for Beginners
When I first started making Crocolini, I made a few mistakes. The dough was too warm, the twists were uneven, and some batches browned too fast. To help you skip that learning curve, here are some tips that have made all the difference for me.
- Keep the Dough Cold: Puff pastry gets its flakiness from the layers of butter and dough. If the butter melts before it hits the oven, you lose those layers. I work quickly and, if my kitchen is warm, I’ll even chill the cut strips in the fridge for 10 minutes before baking.
- Don’t Overwork the Dough: Handle the puff pastry as little as possible. Overworking it can make it tough. Just unroll, top, fold, and cut.
- Use Parchment Paper: I can’t stress this enough. It guarantees your Crocolini won’t stick, especially with the melted sugar. There’s nothing sadder than a perfect twist that’s stuck to the pan.
- Uniform Strips for Even Baking: Try to cut your strips as uniformly as possible. If some are much thicker than others, they won’t bake at the same rate. A ruler can be helpful if you want to be precise.
- Twist Gently: When you twist the dough strips, do it gently. A loose, relaxed twist allows the pastry to puff up to its full potential. If it’s too tight, it can become dense.
Following these simple pointers has consistently given me light, flaky, and perfectly golden Crocolini every time.
Crocolini Variations and Flavor Ideas
This is where you can really get creative. The basic Crocolini is a blank canvas. While the classic cinnamon-sugar version is a crowd-pleaser, I love experimenting with different flavors. Some have been hits, others misses, but it’s all part of the fun.
Sweet Variations:
- Chocolate Drizzle: After the Crocolini have cooled, melt some dark or milk chocolate and drizzle it over the top.
- Nutty Crunch: Before baking, sprinkle finely chopped nuts like almonds, pecans, or pistachios over the egg wash.
- Lemon and Poppy Seed: Add lemon zest and poppy seeds to the sugar mixture for a bright, fresh flavor.
- Vanilla Bean: Scrape the seeds from a vanilla bean into the sugar for an incredibly aromatic and sophisticated treat.
Savory Variations:
- Parmesan and Herb: This is my go-to savory version. I mix grated Parmesan, a little garlic powder, and some dried Italian herbs (like rosemary and thyme) and sprinkle it over the buttered pastry.
- Everything Bagel: Simply use everything bagel seasoning as your topping. It’s fantastic on its own or served with cream cheese dip.
- Spicy Cheese: Add a pinch of cayenne pepper or red pepper flakes to the Parmesan mixture for a little kick.
- Pesto Twist: Spread a thin layer of pesto on the puff pastry before folding. The flavor bakes right into the layers.
Feel free to mix and match! The possibilities are truly endless, and discovering a new favorite combination is part of the joy of baking at home.
Crocolini as a Snack or Dessert
One of the things I appreciate most about Crocolini is their versatility. They aren’t confined to one part of the meal or one time of day. I’ve served them in so many different ways, and they always seem to fit right in.
As a snack, they are perfect for that mid-afternoon slump. A sweet Crocolini with a cup of coffee or tea feels like a small, indulgent break. A savory one is great for tiding you over until dinner. I often pack them for road trips or picnics because they travel well and aren’t messy.
For dessert, they can be the star or a supporting player. A pile of warm, cinnamon-sugar Crocolini served with a side of chocolate or caramel dipping sauce is a simple yet impressive dessert. They are also wonderful served alongside a scoop of vanilla ice cream, adding a delightful textural contrast.
As an appetizer, savory Crocolini are a guaranteed hit. I like to serve Parmesan and herb twists with a bowl of marinara sauce for dipping, or arrange them on a cheese board. They look so elegant and are much more interesting than plain crackers.
Common Mistakes to Avoid When Making Crocolini
Perfecting any recipe involves a bit of trial and error. I’ve certainly had my share of less-than-perfect batches of Crocolini. To help you get it right on your first try, here are some common mistakes and how to sidestep them.
- Using Warm or Sticky Dough: Puff pastry must be cold. If it gets warm, the butter starts to melt, and the dough becomes sticky and difficult to handle. If you notice your dough getting soft, pop it back in the fridge for 10-15 minutes.
- Not Using an Egg Wash: You might be tempted to skip the egg wash, but I’ve found it’s essential for two reasons. It helps toppings stick, and it gives the pastries that beautiful, glossy, golden-brown finish. Without it, they can look pale and a bit dull.
- Overcrowding the Baking Sheet: It’s tempting to squeeze as many as you can onto one sheet, but Crocolini need space to puff up and cook evenly. If they are too close together, they will steam instead of bake, and you’ll lose that crispiness. Use two sheets if you need to.
- Underbaking: A pale Crocolini is a sad Crocolini. Don’t be afraid to let them get a deep golden brown. That color means flavor and crunch. Underbaked ones will be soft and doughy in the middle.
- Uneven Twisting: Twisting some strips tightly and others loosely will result in an uneven bake. Some might burn while others are still doughy. What usually works best is a consistent, gentle two or three twists per strip.
Avoiding these common pitfalls will set you up for success and ensure your Crocolini are as delicious as they look.
Homemade vs. Store-Bought Crocolini
You might see pre-packaged Crocolini or similar puff pastry twists in stores, and they can be quite good. However, from my experience, making them at home has some clear advantages that make it worth the small amount of effort.
Homemade Crocolini:
- Freshness: There is nothing like a Crocolini fresh from the oven. The warmth, the aroma, and the perfect crunch are something you just can’t get from a package.
- Ingredient Control: You know exactly what’s in them. You can choose all-butter puff pastry, organic sugar, or high-quality cheese. This is a big plus for me.
- Customization: You can make any flavor combination you can dream of. Want a spicy-sweet version? Go for it. Need a specific herb blend to match a dip? No problem.
- Cost-Effective: Making a large batch at home is often cheaper than buying multiple small packages from a specialty store.
Store-Bought Crocolini:
- Convenience: The biggest advantage is convenience. You just open the box and they’re ready to serve. This is great when you’re truly short on time.
- Consistency: A commercial product will be perfectly uniform in size, shape, and flavor every time.
- Long Shelf Life: They are made to be shelf-stable, so you can keep a box in the pantry for unexpected guests.
While store-bought has its place, I’ve found that the superior taste and satisfaction of making Crocolini myself always win out. The process is enjoyable, and the result is so much more rewarding.
Real-Life Experiences: Crocolini at Home
I’ll never forget the first time I made Crocolini for a small get-together with friends. I had decided to make a savory batch with Parmesan and rosemary to go with a cheese board. I was a little nervous, hoping they would turn out as well as they did in my test runs.
As soon as I pulled them from the oven, the whole kitchen filled with the incredible smell of baking butter and herbs. I arranged them in a tall glass, and they looked so professional. My friends arrived, and before I had even finished setting out the cheese, someone grabbed a Crocolini. Their eyes lit up, and they immediately asked, “What are these, and where can I get more?”
That evening, the Crocolini were the star of the show. Everyone loved them, and the entire batch disappeared long before the cheese did. It was such a rewarding moment. It proved to me that a simple, homemade snack can make a big impression. Since then, they’ve become my signature offering for parties, potlucks, and even as little homemade gifts during the holidays.
Pros and Cons of Making Crocolini at Home
If you’re still on the fence about whether to make your own Crocolini, here’s a straightforward breakdown of the pros and cons based on my own experiences.
Pros:
- Incredible Flavor and Texture: Homemade is always fresher, and the taste of warm, buttery pastry is unbeatable.
- Endless Customization: You are in complete control of the flavors. Sweet, savory, spicy—it’s all up to you.
- Impressive Results with Minimal Effort: They look fancy and complicated, but they are surprisingly simple to make, especially with store-bought puff pastry.
- A Fun Kitchen Project: The process of twisting the dough is fun for adults and a great activity to do with kids.
Cons:
- Requires Some Planning: You need to have puff pastry on hand and make sure it’s properly thawed, which takes a few hours.
- Best Eaten Fresh: While still good the next day, Crocolini are at their absolute best within hours of being baked. They can lose some of their crispness over time.
- Can Be Messy: Working with flour, sugar, and melted butter can create a bit of a mess on your countertops.
- Temperature Sensitivity: Puff pastry can be finicky if your kitchen is too warm, requiring you to work quickly or chill the dough.
For me, the pros far outweigh the cons. The small amount of planning is well worth the delicious, impressive results.
Crocolini Storage and Shelf Life
One of the most common questions I get is how to store leftover Crocolini (if you have any!). Because they are made from puff pastry, their texture is best on the day they are made. However, you can certainly store them for a few days.
What usually works best is to let them cool completely and then store them in an airtight container at room temperature. A tin or a well-sealed plastic container is ideal. I’ve noticed that storing them this way keeps them reasonably crisp for up to 3 days.
If they do get a little soft, you can easily bring them back to life. Just place them on a baking sheet and pop them into a 350°F (175°C) oven for about 3–5 minutes. This will re-crisp the pastry and warm them up beautifully.
I would avoid storing them in the refrigerator, as the moisture can make them soggy. For the same reason, don’t store them in a plastic bag, which can trap moisture. An airtight container is definitely the way to go.
Conclusion
Making Crocolini at home is one of those simple culinary joys that delivers impressive results with very little fuss. It transforms a humble sheet of puff pastry into an elegant, crunchy, and incredibly satisfying snack that is perfect for any occasion. From the moment you start twisting the dough to the second you pull a tray of golden, fragrant sticks from the oven, the process is as rewarding as the final product. I’ve made them countless times, and they never fail to impress.
The beauty of this recipe lies in its adaptability. Whether you’re craving a sweet cinnamon-sugar treat to go with your coffee or a savory Parmesan-herb stick to serve with drinks, Crocolini can be customized to fit your mood. It’s a recipe that encourages creativity and experimentation in the kitchen, which is something I always love.
To recap the key points for perfect homemade Crocolini:
- Always start with cold puff pastry for the flakiest layers.
- Don’t skip the egg wash—it’s the secret to a golden, glossy finish.
- Give them space on the baking sheet to puff up and get crispy.
- Bake until they are a deep golden brown for the best flavor and crunch.
I truly believe that anyone can make delicious Crocolini. It’s a forgiving recipe that’s perfect for beginner bakers and a fun project for the whole family. The next time you want to make something special without spending hours in the kitchen, I hope you’ll give this recipe a try. In my experience, once you make your own, you’ll never go back to store-bought again.
FAQ
H3: What is the best type of puff pastry for Crocolini?
I’ve found that an all-butter puff pastry provides the best flavor and texture. The buttery layers create a richer, flakier result compared to those made with shortening. While homemade puff pastry is fantastic, high-quality store-bought versions are a great time-saver and work perfectly for this recipe.
H3: Can I make Crocolini ahead of time?
Yes, you can. You can prepare the strips, twist them, and lay them on a parchment-lined baking sheet. Then, cover them and refrigerate for up to 24 hours or freeze for up to a month. When you’re ready, you can bake them directly from the fridge or freezer, adding a few extra minutes to the baking time if frozen.
H3: My Crocolini came out soft, not crispy. What did I do wrong?
This is usually caused by one of three things: the dough was too warm, the oven wasn’t hot enough, or they were underbaked. Ensure your oven is fully preheated to 400°F (200°C) and bake them until they are a deep golden brown. If they are still pale, they won’t be crispy.
H3: How do I get my toppings to stick to the Crocolini?
The key is to use a binding agent. For a sweet Crocolini, brushing the dough with melted butter before adding the sugar mixture helps it adhere. For both sweet and savory versions, an egg wash brushed over the top before baking works like glue for toppings and also gives a beautiful shine.
H3: Can I make gluten-free Crocolini?
Absolutely! You can use a store-bought gluten-free puff pastry sheet. The process is exactly the same. Just be aware that gluten-free puff pastry can sometimes be a bit more delicate to handle, so work quickly and keep it well-chilled.
H3: What are some good dips to serve with Crocolini?
For sweet Crocolini, I love serving them with:
- Melted chocolate sauce
- Caramel dip
- Cream cheese frosting
For savory versions, try: - Marinara sauce
- Pesto
- Hummus or a whipped feta dip