
An exterior concrete floor, like a patio or porch, is a functional and durable part of your home, but it can often look bland, stained, or cracked over time. Applying a fresh coat of concrete paint exterior floor is one of the most effective ways to transform its appearance, adding color, style, and a layer of protection against the elements. A well-painted surface can revitalize your outdoor space, making it more inviting and visually appealing.
However, painting concrete isn’t as simple as rolling on a coat of standard wall paint. Exterior concrete presents unique challenges, with moisture being its biggest enemy. Without the right preparation and products, you risk common failures like peeling, blistering, and bubbling, turning your hard work into a frustrating mess within months. Many DIY projects fail because they skip crucial steps or use the wrong materials for the job.
This guide cuts through the confusion. We will provide a clear, step-by-step roadmap to successfully painting your concrete paint exterior floor. From proper surface preparation and moisture testing to choosing the right products and applying them correctly, you’ll get expert-backed advice to ensure a beautiful, durable finish that lasts for years to come.
Why Use Concrete Paint on an Exterior Floor?
Painting an exterior concrete floor is a popular choice for homeowners looking to boost curb appeal and protect their investment. The most immediate benefit is aesthetics. Paint offers a vast spectrum of colors and finishes, allowing you to completely transform a dull, gray slab into a vibrant, stylish surface that complements your home’s exterior. It can cover up old stains, discoloration, and minor imperfections, giving your patio, porch, or walkway a clean and uniform look.
Beyond just looks, concrete paint provides a crucial protective barrier. Exterior concrete is constantly exposed to harsh conditions, including UV rays, rain, and foot traffic. A quality coat of paint shields the surface from moisture penetration, which helps prevent spalling and cracking caused by freeze-thaw cycles. It also protects against abrasion, stains from spills, and general wear and tear, extending the life of the concrete itself. When combined with non-slip additives, paint can also significantly improve the safety of a surface that gets wet.
However, there are tradeoffs to consider. Painted concrete requires maintenance. Depending on your climate and the amount of traffic it receives, you may need to touch it up or apply a fresh coat every few years to keep it looking its best. Unlike concrete stains, which penetrate the surface, paint forms a film on top that can eventually peel or chip if not applied correctly. It is a coating, not a permanent finish like a decorative overlay or an epoxy system, which offer superior durability but at a much higher cost.
Painting is an excellent choice if your primary goals are affordability, aesthetic transformation, and adding a protective layer to a structurally sound concrete slab. It’s perfect for a DIY weekend project to refresh an aging patio. If your concrete has significant damage or you need a solution for a high-traffic area that can withstand extreme wear for a decade or more, exploring more durable options like a concrete resurfacer or a professional-grade coating system might be a better long-term investment.
Things That Can Go Wrong: Common Mistakes to Avoid
A beautiful painted concrete floor is achievable, but several common pitfalls can lead to a peeling, blistering mess. Understanding these mistakes is the first step toward ensuring your project is a success. By avoiding them, you can save yourself time, money, and frustration.
- Inadequate Surface Preparation: This is the number one cause of paint failure. Simply hosing down the concrete is not enough. You must remove all dirt, grease, and old, flaky paint. Skipping this step means the new paint adheres to the grime, not the concrete, and will quickly peel away.
- Ignoring Moisture Problems: Concrete is porous and wicks moisture from the ground. If you paint over damp concrete, that moisture gets trapped underneath. As it evaporates, it pushes the paint off the surface, causing bubbles and blisters. Always perform a moisture test before you begin.
- Using the Wrong Products: Interior wall paint or the wrong kind of primer will not survive outdoors. Exterior concrete requires a paint that is breathable, allowing moisture to escape, and durable enough to withstand foot traffic and weather. A bonding primer specifically designed for concrete is also essential for creating a strong adhesive layer.
- Applying Coats Too Thickly: It’s tempting to apply one thick coat to finish the job faster, but this is a critical error. A thick layer of paint takes much longer to cure properly. It’s also more prone to cracking and peeling because it doesn’t form a flexible, well-bonded film. Two thin coats are always better than one thick one.
- Painting in the Wrong Weather: Applying paint in direct, hot sunlight can cause it to dry too quickly, preventing proper adhesion. Conversely, painting in high humidity or when rain is forecast can introduce too much moisture. Ideal conditions are typically a mild, overcast day.
- Rushing the Curing Process or Skipping the Sealer: Paint needs time to cure and harden completely, which can take several days. Placing furniture or allowing heavy foot traffic too soon can damage the finish. Additionally, forgoing a final sealer coat leaves the paint vulnerable to abrasion, UV damage, and stains, significantly shortening its lifespan.
Prepping the Exterior Concrete Floor
Proper preparation is the most critical phase of painting an exterior concrete floor. A pristine, stable surface is essential for paint adhesion and a long-lasting finish. Skipping these steps is the fastest way to project failure, so invest the time here to get it right.
1. Clean the Surface Thoroughly
Start by clearing the area of all furniture, planters, and debris. Sweep the surface clean of loose dirt and leaves. For deep cleaning, a pressure washer is your best tool to remove ground-in grime and flaky, old paint. If you have oil, grease, or tire marks, you must use a concrete degreaser. Apply it according to the product directions, scrub with a stiff brush, and rinse completely. The surface must be perfectly clean for the primer to bond.
2. Repair Cracks and Holes
Inspect the floor for any cracks, chips, or spalling. Small cracks can be filled with a flexible concrete caulk or crack filler. For larger holes or damaged areas, use a concrete patching compound. Follow the product instructions carefully, overfilling the repair slightly and smoothing it level with the surrounding surface. Allow all repairs to cure fully, which can take several hours or days depending on the product and weather.
3. Test for Moisture
Moisture is the primary enemy of concrete paint. Before priming, you must check if the slab is dry enough. A simple way to do this is the plastic sheet test: tape a 2×2 foot square of plastic sheeting on all four sides to the concrete. Leave it for 24 hours. If you see condensation under the plastic or the concrete looks darker when you remove it, you have a moisture issue that must be addressed before painting. Alternatively, a moisture meter can provide a more precise reading.
4. Etch the Surface (If Needed)
New or very smooth, troweled concrete is too slick for paint to grab onto effectively. The surface needs a texture similar to medium-grit sandpaper. To achieve this, you can use an etching solution. These products, typically acid-based, open the pores of the concrete. Follow all safety precautions, apply the etcher, scrub, and rinse thoroughly. The concrete is ready when it feels slightly rough to the touch.
Primer: Why It Matters & Which One to Use
Skipping primer on an exterior concrete floor is a recipe for failure. Primer is not just thin paint; it’s a specialized adhesive designed to solve problems and prepare the surface for the topcoat. Its main job is to create a tenacious bond between the porous, alkaline concrete and the paint. Without it, your paint will sit on the surface without truly gripping it, leading to premature peeling and chipping, especially in high-traffic or weather-exposed areas. Think of it as the essential bridge that ensures your paint job lasts.
When choosing a primer, look for one specifically labeled as a “bonding primer” for concrete or masonry. These are formulated to penetrate the concrete’s pores and create a locked-in foundation.
- Bonding Primers: This is your go-to choice for most situations. They are designed to adhere to challenging surfaces like dense or previously painted concrete, ensuring your topcoat sticks securely.
- Moisture-Blocking or Waterproofing Primers: If your moisture test revealed dampness, a waterproofing or vapor barrier primer is necessary. These specialized products create an impermeable layer that keeps ground moisture from pushing its way up and blistering the paint.
- Breathable Primers: For some applications, a breathable (vapor-permeable) primer is ideal, as it allows small amounts of moisture vapor to escape without lifting the paint. This is often paired with a breathable topcoat.
Applying primer correctly is just as important as choosing the right one. Start by using a paintbrush to “cut in” the primer around the edges of the slab and any permanent fixtures. For the main area, use a roller with a 1/2-inch nap to apply a thin, even coat. Work in small sections, maintaining a “wet edge” by overlapping each roller pass onto the still-wet previous one. This technique prevents visible lap marks and ensures a uniform finish. Allow the primer to dry completely according to the manufacturer’s instructions before applying your first coat of paint.
Choosing the Right Paint for Exterior Concrete Floor
Selecting the correct paint is crucial for ensuring your exterior concrete floor not only looks great but also withstands the elements. Standard house paint won’t survive the demands of foot traffic and weather, so you need a product specifically formulated for this purpose. The right choice depends on your climate, budget, and desired durability.
Here are the most common types of paint for exterior concrete floors:
- Acrylic Latex Paint: This is a popular and user-friendly option for DIY projects. Look for formulas designated for patios and floors. High-quality acrylic paints offer good UV resistance to prevent fading and are breathable, which allows trapped moisture to escape, reducing the risk of blistering. While not as tough as epoxies, they are affordable and easy to apply and touch up.
- 1-Part Epoxy Paint: A step up in durability from standard acrylics, 1-part epoxies are pre-mixed and apply like regular paint but offer enhanced resistance to chemicals and abrasion. They provide a hard, durable finish that holds up well against foot traffic and scuffs, making them a great middle-ground choice.
- Elastomeric Paint/Coatings: Ideal for concrete that has numerous hairline cracks, elastomeric coatings are extremely flexible. They bridge small gaps and can expand and contract with temperature changes without cracking. They are also highly waterproof and durable, offering excellent protection.
- Polyurethane Paint: Often used as a sealer over an epoxy base, polyurethane offers superior resistance to UV rays, chemicals, and abrasion. It creates a very tough and long-lasting finish that won’t yellow over time, making it excellent for floors exposed to direct sunlight.
When making your decision, prioritize breathability to prevent moisture issues and UV resistance to keep the color from fading. For safety, especially on surfaces that get wet, mix a non-slip additive directly into your final coat of paint. These fine grits create a textured surface that provides traction without feeling rough underfoot. Finally, consider your color and finish. Lighter colors can make a space feel larger and stay cooler in the sun, while darker shades can hide dirt more effectively. Finishes range from matte to high-gloss, with satin or semi-gloss often providing a good balance of durability and easy cleaning.
Application: How to Paint Your Exterior Concrete Floor
With your surface prepped and primed, it’s time for the transformation. Applying the paint correctly is key to achieving a smooth, professional-looking finish that will last. Gather your tools, work methodically, and pay attention to technique to get the best results.
1. Gather Your Tools and Plan Your Exit
Before you start, make sure you have everything you need: a paint tray, a 2-3 inch angled brush for cutting in, and a roller with a 1/2-inch nap cover suitable for semi-rough surfaces. If you’re painting a large, enclosed area, plan your painting path so you don’t paint yourself into a corner. Always start at the farthest point from your exit.
2. Cut in the Edges
Begin by “cutting in” around the perimeter of the concrete slab using your angled brush. Apply a 3-4 inch band of paint along all edges, corners, and around any permanent objects like posts or drains. This step ensures you have clean lines and full coverage in areas the roller can’t easily reach. Work in manageable sections so the cut-in paint doesn’t dry before you roll the main area.
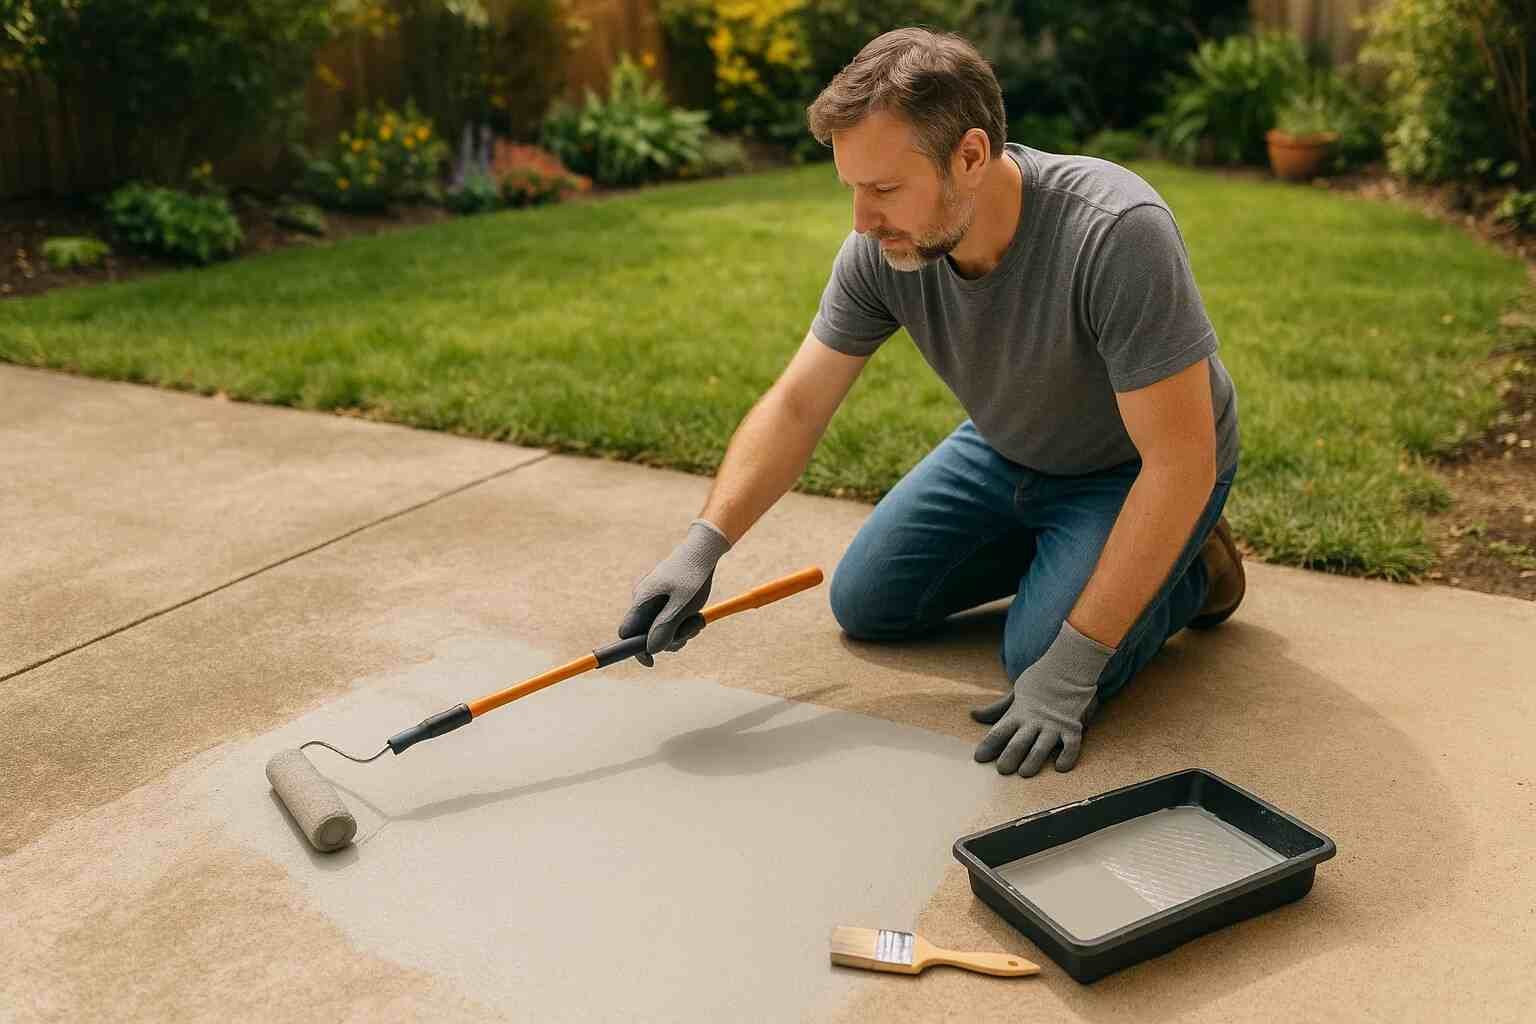
3. Roll the First Coat
Pour your paint into the tray and load your roller, making sure it’s evenly coated but not dripping. Start rolling in a small section, applying light, consistent pressure. Work in a “W” pattern to distribute the paint, then go back over the area with straight, slightly overlapping strokes to even it out. This method helps prevent streaks and ensures uniform coverage.
4. Maintain a “Wet Edge”
The secret to avoiding visible lap marks is to always maintain a “wet edge.” This means your roller should always overlap onto the still-wet paint from the previous pass. If you let an edge dry before rolling the next section, you’ll see a distinct line where the two areas meet. Work quickly and systematically to keep the leading edge of your painted area wet.
5. Apply the Second Coat
Allow the first coat to dry completely according to the manufacturer’s directions—don’t rush this step. Once it’s ready, apply the second coat using the same technique: cut in the edges first, then roll the main surface while maintaining a wet edge. Two thin, even coats will provide a much more durable and consistent finish than one thick, heavy coat.
Conclusion
Painting an exterior concrete floor with the right products is a highly rewarding project that can dramatically improve your outdoor living space. Using concrete paint exterior floor specifically designed for outdoor surfaces ensures durability and a professional finish. While it requires more than just a can of paint and a roller, the path to a long-lasting, beautiful finish is clear. Success lies in meticulous preparation, smart product choices, and careful application. By cleaning, repairing, and testing your concrete for moisture, you create the stable foundation your paint needs to last. Choosing the right bonding primer and a high-quality concrete paint exterior floor will provide the resilience to stand up to weather and foot traffic.
Also Read:
How to Choose the Perfect Outdoor Wall Lamp: A Step-by-Step Guide
How to Choose the Perfect Outdoor Wall Lamp: A Step-by-Step Guide