
Painting an exterior concrete surface is about more than just a color upgrade. A fresh coat of paint can protect your patio, driveway, or walkway from weather damage, stains, and daily wear and tear. But with so many options available, choosing the right exterior concrete floor paint is crucial. These surfaces face significant challenges, including moisture from the ground, harsh UV rays, and constant temperature changes.
Getting a durable, long-lasting finish requires more than just picking a color. This guide will walk you through everything you need to know, from selecting the best paint for your needs to preparing the surface and applying it like a pro. By the end, you’ll have the knowledge to transform your outdoor concrete and ensure the finish stands up to the elements for years to come.
Why Paint Your Exterior Concrete Floors?
Painting concrete offers a dual benefit: it enhances the look of your space while adding a vital layer of protection. A quality paint job can instantly boost curb appeal, turning a drab patio or driveway into an inviting feature of your home.
Beyond aesthetics, paint seals the porous surface of the concrete. This prevents water from seeping in, which can lead to cracking, especially in climates with freeze-thaw cycles. It also protects against stains from oil, dirt, and chemicals. However, using the wrong paint can trap moisture, causing bubbles and peeling. In some cases, a penetrating sealer might be a better option if you want to preserve the natural look of the concrete while still protecting it.
Key Properties to Look for in Exterior Concrete Floor Paint
When shopping for paint, look past the color swatches and focus on these technical features to ensure you get a product that lasts.
- Durability: The paint must be tough enough to handle foot traffic and, for driveways, the weight of vehicles. Look for paints specifically labeled for floors or high-traffic areas.
- Weather Resistance: Your paint needs to withstand everything nature throws at it. Excellent UV resistance will prevent fading, while flexibility helps the paint move with the concrete as it expands and contracts with temperature changes.
- Breathability: This is one of the most critical factors. Breathable, or vapor-permeable, paint allows moisture vapor from the ground to escape through the coating. Without this, trapped moisture will push the paint off the surface, leading to blisters and peeling.
- Flexibility: Concrete can develop hairline cracks over time. Flexible paints, like elastomeric or some acrylics, can stretch over these small imperfections, maintaining a solid, protective barrier.
- Chemical Resistance: If you’re painting a garage floor or driveway, choose a paint that can resist damage from oil, gasoline, and other common chemicals.
- Slip Resistance: Wet concrete patios and pool decks can be hazardous. Many floor paints have a non-slip texture, or you can mix in an anti-slip additive for extra grip.
Types of Paint for Exterior Concrete Floors
Not all paints are created equal. The right choice depends on your budget, the surface’s use, and the level of durability you need.
- Epoxy Paint: Known for its extreme durability and resistance to chemicals, epoxy is a fantastic choice for garages and high-traffic driveways. Two-part epoxies, which require mixing a resin and a hardener, offer superior performance compared to pre-mixed, one-part formulas.
- Acrylic/Latex Floor Paint: This is a popular choice for patios and walkways. Acrylic latex paints are flexible, breathable, and offer good UV resistance. They are also easier to apply and clean up than epoxies.
- Polyurethane/Urethane Coatings: Even tougher than epoxy, polyurethane coatings offer excellent resistance to abrasion, chemicals, and UV rays, meaning the color won’t yellow over time. They are often applied as a top coat over epoxy for maximum protection.
- Elastomeric Paint: If your concrete has a lot of hairline cracks, elastomeric paint is an ideal solution. It is extremely flexible and can stretch to bridge small gaps, creating a waterproof and durable surface.
- Mineral/Silicate Paints: These paints penetrate the concrete and form a chemical bond with the surface, making them incredibly durable and breathable. They are highly resistant to UV damage and will not peel or blister.
Preparing Your Concrete Surface for Painting
Proper preparation is the single most important step for a successful paint job. Skipping this will almost certainly lead to paint failure.
- Clean the Surface: Start by sweeping away all loose debris. Then, use a pressure washer to remove ingrained dirt, mildew, and any previous coatings that are flaking. For stubborn oil or grease stains, use a concrete degreaser.
- Repair Cracks and Holes: Fill any cracks or holes with a concrete patch or filler product. For larger cracks, you may need to use a flexible sealant. Allow all repairs to cure completely according to the product instructions.
- Test for Moisture: Before painting, you need to know if moisture is coming up through the slab. Tape a 2×2 foot square of plastic sheeting to the concrete on all four sides. After 24 hours, check for condensation under the plastic. If you see moisture, you must use a breathable paint or first apply a waterproofing sealer.
- Etch the Concrete: Most new or smooth-troweled concrete is too slick for paint to adhere to properly. Etching the surface gives it a texture, like fine-grit sandpaper, for the paint to grip. You can use an etching solution (often a mild acid) or a mechanical grinder. Always follow safety precautions, including wearing gloves, goggles, and a respirator.
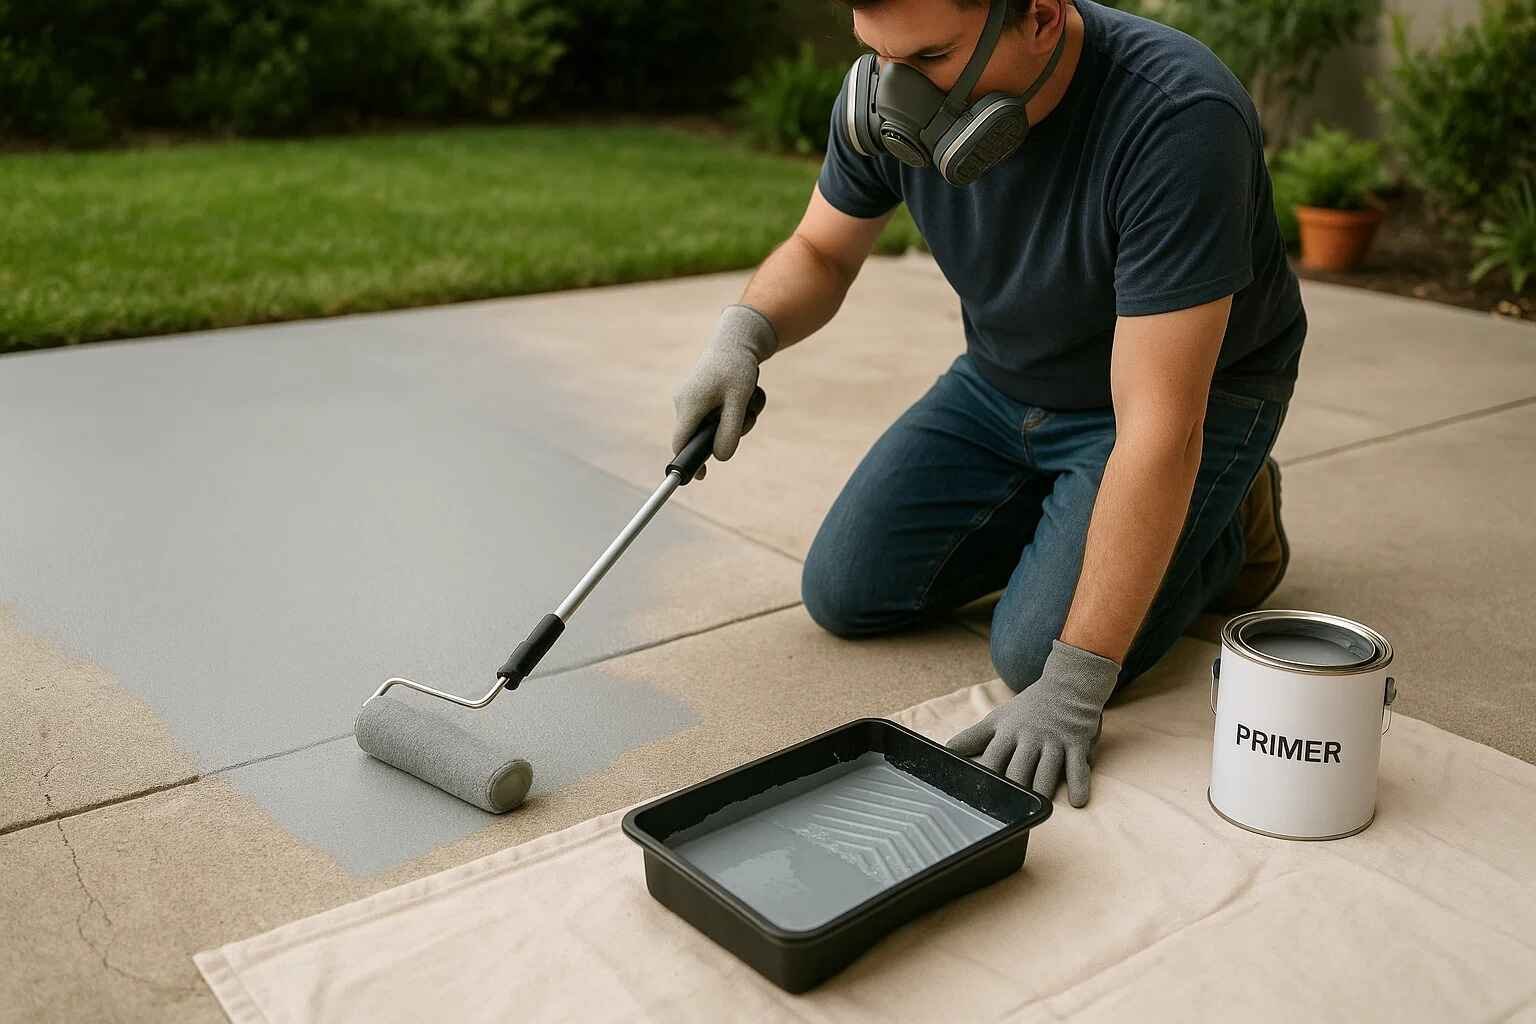
Primer — Do You Need It?
In most cases, yes. Primer is essential for ensuring strong adhesion and a uniform finish. It helps the top coat bond to the concrete, prevents stains from bleeding through, and can seal the porous surface to prevent the paint from soaking in unevenly.
Choose a primer designed for concrete, often called a bonding primer. Some floor paints are “all-in-one” products with a built-in primer, but for the best results on bare concrete, a separate priming step is highly recommended.
Application Process: Step-By-Step
With your surface prepped and primed, you’re ready to paint.
- Gather Your Tools: You will need a paint roller with an extension pole, a 3/8-inch nap roller cover, a paint tray, and a paintbrush for cutting in edges. A sprayer can also be used for large areas.
- Apply the First Coat: Start by using your brush to paint the perimeter of the area. Then, use the roller to apply a thin, even coat to the rest of the surface. Work in manageable sections and maintain a wet edge to avoid lap marks.
- Apply the Second Coat: Allow the first coat to dry completely, following the manufacturer’s recommended recoat time. Applying a second coat ensures full coverage and a more durable, longer-lasting finish.
A key tip is to avoid painting in direct, hot sunlight, as this can cause the paint to dry too quickly and show roller marks.
Drying, Curing, and Weather Considerations
Patience is key after painting. While the paint may be dry to the touch in a few hours, it takes much longer to fully cure.
- Drying Time: This varies based on the paint type, temperature, and humidity. Check the paint can for specific times.
- Curing Time: Full curing, when the paint reaches maximum hardness, can take anywhere from a few days to a full week. Avoid placing heavy furniture or driving on the surface until it is fully cured.
- Weather: Plan your project around a clear weather forecast. Rain can ruin a fresh coat of paint, and high humidity will prolong drying times.
Non-Slip & Safety Features
For any outdoor surface that gets wet, adding slip resistance is a smart safety measure.
You can achieve this by mixing a non-slip additive, which is essentially fine sand or aggregate, directly into your final coat of paint. Another method is to broadcast the aggregate onto the wet paint and then back-roll it to set it in place. Choosing a matte or satin finish over a high-gloss one will also provide slightly more traction.
Maintenance & Longevity
To keep your painted concrete looking great, regular maintenance is essential.
- Cleaning: Gently clean the surface periodically with a mild detergent and water. Avoid using harsh chemicals or a pressure washer, which can damage the paint.
- Inspecting for Wear: Regularly check for signs of peeling, bubbling, or cracking. Catching these issues early makes them much easier to repair.
- Recoating: Depending on the paint quality and local climate, you may need to apply a fresh maintenance coat every 3-5 years to keep the surface protected and looking its best.
Common Problems & Troubleshooting
Even with careful prep, issues can arise.
- Bubbling or Blistering: This is almost always caused by trapped moisture or painting on a hot surface. The fix involves scraping the bubbles, sanding the area, and ensuring the source of the moisture is addressed before repainting.
- Peeling: Paint that peels away in sheets is a sign of poor adhesion, likely due to inadequate surface preparation. You’ll need to scrape and sand all loose paint before repriming and repainting.
- Fading: Low-quality paints with poor UV resistance will fade over time. Using a high-quality, UV-stable paint is the best prevention.
Cost & Budget Planning
The cost of painting concrete can vary widely. When budgeting, factor in the price of the paint, primer, cleaning solutions, and tools like rollers and brushes. A two-part epoxy will cost more per gallon than an acrylic-latex paint, but its superior durability may offer better long-term value. For large projects, weigh the cost of materials and your time against the price of hiring a professional contractor.
Eco-Friendly & Low-VOC Options
Many modern paints are formulated to be more environmentally friendly. Look for water-based acrylic or mineral paints with low or zero volatile organic compounds (VOCs). These products release fewer harmful chemicals into the atmosphere, making them a safer choice for you and the environment without sacrificing performance.
Conclusion
Choosing and applying the right exterior concrete floor paint can dramatically improve the look and lifespan of your outdoor spaces. The key to a finish that lasts is not in the application itself, but in the careful planning that comes before.
By focusing on diligent surface preparation, selecting a paint type suited to your climate and use case, and performing regular maintenance, you can achieve a professional-quality result. Take the time to assess your surface, plan your project, and you’ll be rewarded with a beautiful, durable finish that you can enjoy for years to come.
Frequently Asked Questions (FAQ)
What type of paint is best for exterior concrete floors?
For most patios and walkways, a high-quality acrylic latex floor paint is a great choice due to its flexibility and breathability. For high-traffic areas like driveways, a two-part epoxy or polyurethane coating offers superior durability.
Do I need to etch or prime concrete before painting?
Yes, in almost all cases. Etching creates a profile for the paint to adhere to, and primer ensures a strong bond. Skipping these steps is the most common cause of paint failure.
How many coats should I apply?
You should always apply at least two coats: one coat of primer and one top coat. For the best durability and color depth, apply one coat of primer followed by two top coats.
How long will the paint last outdoors?
With proper preparation and high-quality paint, an exterior concrete finish can last 3-5 years or more before needing a maintenance coat. Durability depends on traffic, climate, and sun exposure.
How do I stop peeling or bubbling?
The best way is through prevention. Ensure the concrete is completely clean, dry, and properly etched before painting. Use a breathable paint to allow moisture to escape.
Is there a non-slip concrete paint?
Yes, many floor paints come with a textured finish. You can also mix a non-slip additive into your final coat of paint to create a safer, high-traction surface.
What are low-VOC options for concrete paint?
Water-based acrylic latex and mineral silicate paints are excellent low-VOC options. They are more environmentally friendly and release fewer odors during application.
Also Read:
The Ultimate Guide to Outdoor Wall Sconces: Illuminating Your Home’s Style and Safety
The Ultimate Guide to Outdoor Wall Sconces: Illuminating Your Home’s Style and Safety