
Introduction
A cluttered kitchen can make cooking feel like a chore. When you can’t find what you need, meal prep becomes stressful and inefficient. The solution often lies behind closed doors: your kitchen cabinets. Learning how to organize kitchen cabinets is a transformative project that brings order and calm to the heart of your home. This guide provides a clear, step-by-step process to declutter, categorize, and create a system that works for you. Get ready to enjoy a more functional and peaceful kitchen space where everything has its place.
Step 1: Empty and Clean Everything
The first and most important step is to create a blank slate. Take everything out of your cabinets, one at a time. This might seem overwhelming, but it’s essential for a proper reset. Set all items on your countertops, dining table, or the floor.
Once the cabinets are empty, give them a thorough cleaning. Wipe down the shelves and interior walls with a good all-purpose cleaner to remove dust, crumbs, and old spills. A clean space will make the end result feel even more satisfying and fresh.
Step 2: Declutter and Sort Your Items
With everything laid out, it’s time to decide what stays and what goes. Create three piles: keep, donate/sell, and trash. Be honest with yourself about what you actually use. This is the key to effectively organize your kitchen cabinets for the long term.
Ask yourself:
- Have I used this in the last year?
- Is it broken or expired?
- Do I have duplicates of this item?
- Does this item truly belong in the kitchen?
Get rid of expired spices, chipped dishes, and gadgets you never use. This decluttering phase will free up valuable space for the items you love and need.
Step 3: Create Zones for Your Items
Now, group the items you’re keeping into logical categories. This “zoning” strategy is fundamental to an organized kitchen. By storing similar items together, you’ll always know where to find what you need. This system makes both cooking and putting things away much simpler.
Common Kitchen Zones
- Cooking Zone: Pots, pans, baking sheets, and cooking utensils near the stove.
- Prep Zone: Mixing bowls, cutting boards, and measuring cups near a clear countertop space.
- Dishware Zone: Everyday plates, bowls, and glasses near the dishwasher or sink for easy access.
- Pantry Zone: Canned goods, dry ingredients, and spices.
- Coffee/Tea Station: Mugs, coffee maker, tea bags, and sugar.
Step 4: How to Organize Kitchen Cabinets with Food
Organizing your food items properly keeps your kitchen efficient and reduces waste. Group similar items together, like all your pastas, grains, or canned vegetables. This prevents you from buying duplicates and helps you see what you have at a glance.
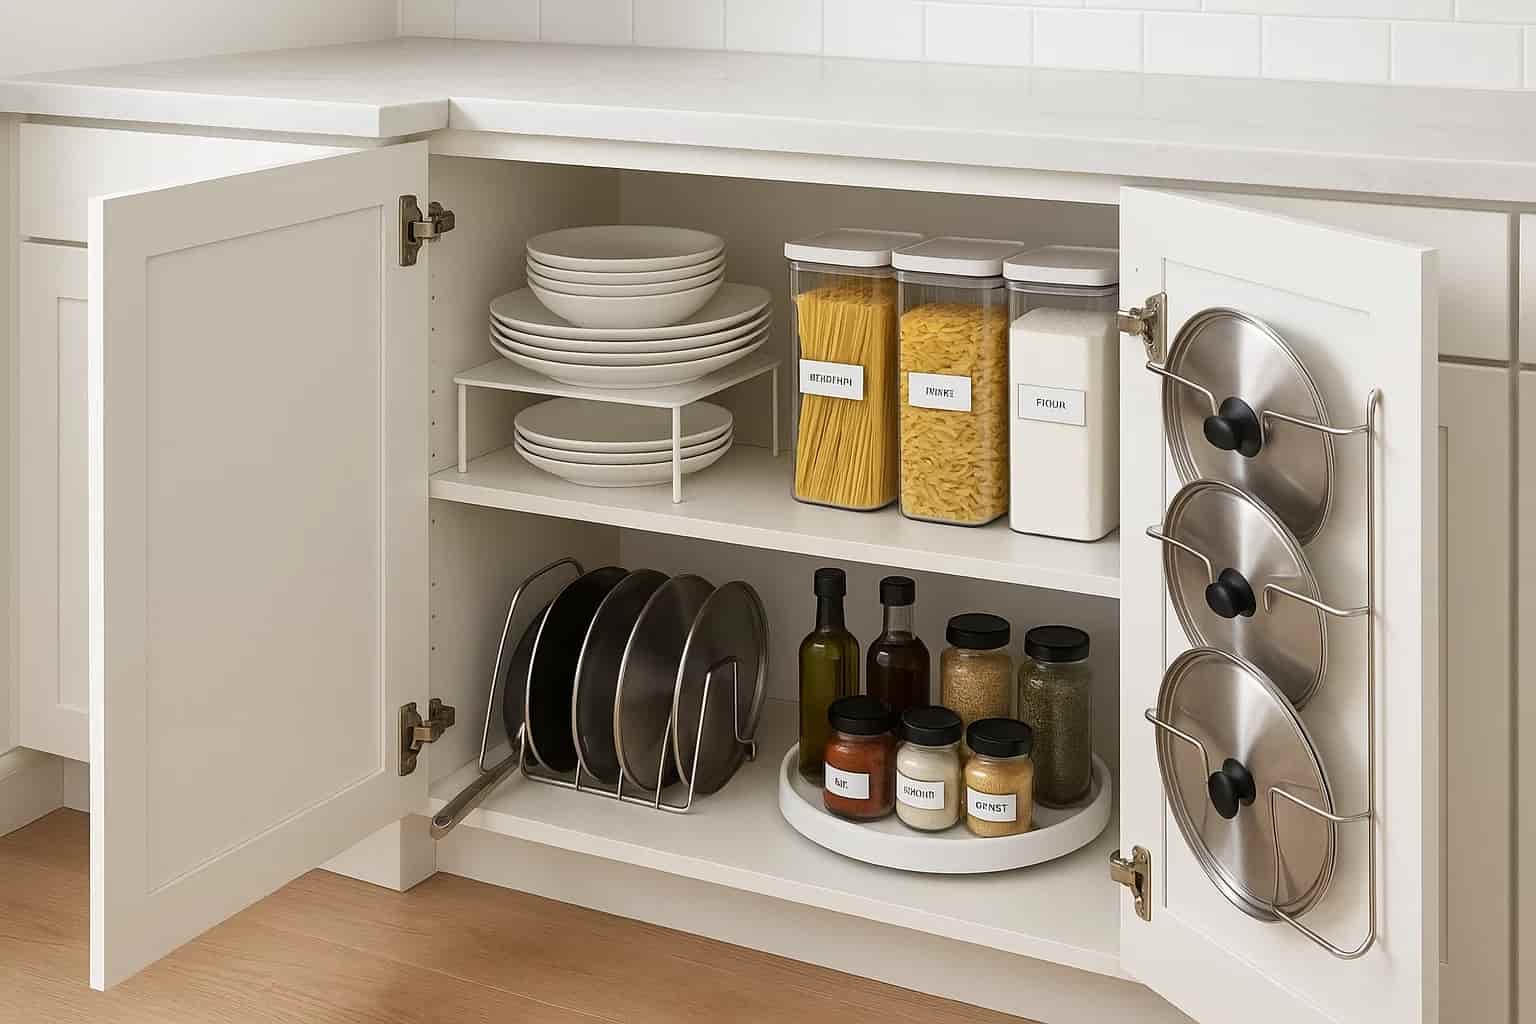
Consider using clear, airtight containers for dry goods like flour, sugar, and cereal. They keep food fresh longer and create a uniform, tidy look. Labeling these containers is also a great idea, so you never mix up salt and sugar again.
Step 5: Arranging Dishes, Glasses, and Silverware
For everyday dishes and glasses, accessibility is key. Store them in a cabinet close to the dishwasher or sink to make unloading a breeze. Stacking plates and bowls by size is the most common and space-efficient method. You can use shelf risers to double your storage.
For glassware, arrange items by type. Keep all your water glasses together and wine glasses separate. If you have fine china or special occasion dishware, consider storing it in a higher, less-accessible cabinet to protect it and free up prime space.
Step 6: Taming Pots, Pans, and Bakeware
Pots and pans can be some of the most challenging items to organize. One of the best solutions is to use a pull-out organizer or a lid rack. Stacking pans is common, but it can lead to scratches and frustrating searches for the right one.
Try storing pans vertically with a simple file organizer or a dedicated bakeware rack. For lids, use an over-the-door rack on the inside of your cabinet door. This keeps them visible and out of the way, making it easy to grab the one you need.
Step 7: Utilizing Cabinet Organizers
Cabinet organizers are your best friend when it comes to maximizing space. These tools help you use every inch of your cabinet, including vertical space that often goes to waste. They are essential for anyone wanting to truly master how to organize kitchen cabinets.
Helpful Organizer Ideas:
- Turntables (Lazy Susans): Perfect for corner cabinets or for storing spices and oils.
- Shelf Risers: Instantly double the storage space for plates, mugs, or canned goods.
- Drawer Dividers: Keep utensils, cutlery, and gadgets neatly separated.
- Pull-Out Shelves: Bring items from the back of the cabinet to you, preventing lost items.
Step 8: Maintaining Your Organized System
Once you’ve put in the work, the final step is to maintain it. An organized kitchen can only stay that way if you stick to the system. Make a habit of putting things back in their designated zones immediately after use.
Schedule a quick 10-minute tidy-up once a week to address any areas that are starting to get cluttered. A full reorganization should only be needed once or twice a year. This small effort will ensure your kitchen remains a functional and enjoyable space.
Conclusion
Knowing how to organize kitchen cabinets is about more than just a tidy-looking kitchen; it’s about creating a more functional, stress-free environment for you and your family. By taking the time to empty, declutter, and create logical zones, you can build a system that simplifies your daily routine. Using smart organizers and committing to regular maintenance ensures your hard work pays off for a long time. Now you can enjoy the peace and efficiency that comes with having a place for everything and everything in its place.
If you found this guide helpful, share it with a friend who could use an organization boost! Explore our other articles for more home improvement tips and leave a comment below with your favorite cabinet organizing trick.
Frequently Asked Questions
H3: How often should I organize my kitchen cabinets?
A deep organization and decluttering is recommended once or twice a year. However, a quick 10-15 minute tidying session every month can help maintain the system and prevent clutter from building up again.
H3: What is the best way to organize corner cabinets?
Corner cabinets are notorious for being awkward. The best solution is to use a multi-tiered turntable (Lazy Susan) or specially designed pull-out shelving that allows you to access items stored in the back easily.
H3: Should I use shelf liners in my kitchen cabinets?
Shelf liners are a great idea. They protect your shelves from spills and scratches, make cleaning easier, and can add a pop of color or pattern to your cabinets for a more finished look.