
Introduction
Giving your kitchen a fresh look doesn’t have to mean a full renovation. A new coat of paint on your cabinets can completely transform the space for a fraction of the cost. If you’re looking for a rewarding weekend project, learning how to paint kitchen cabinets is a game-changer. This comprehensive guide will walk you through every step, from preparation to the final coat. We will cover the tools you need, the best type of paint to use, and the techniques to ensure a smooth, professional-quality finish that lasts for years.
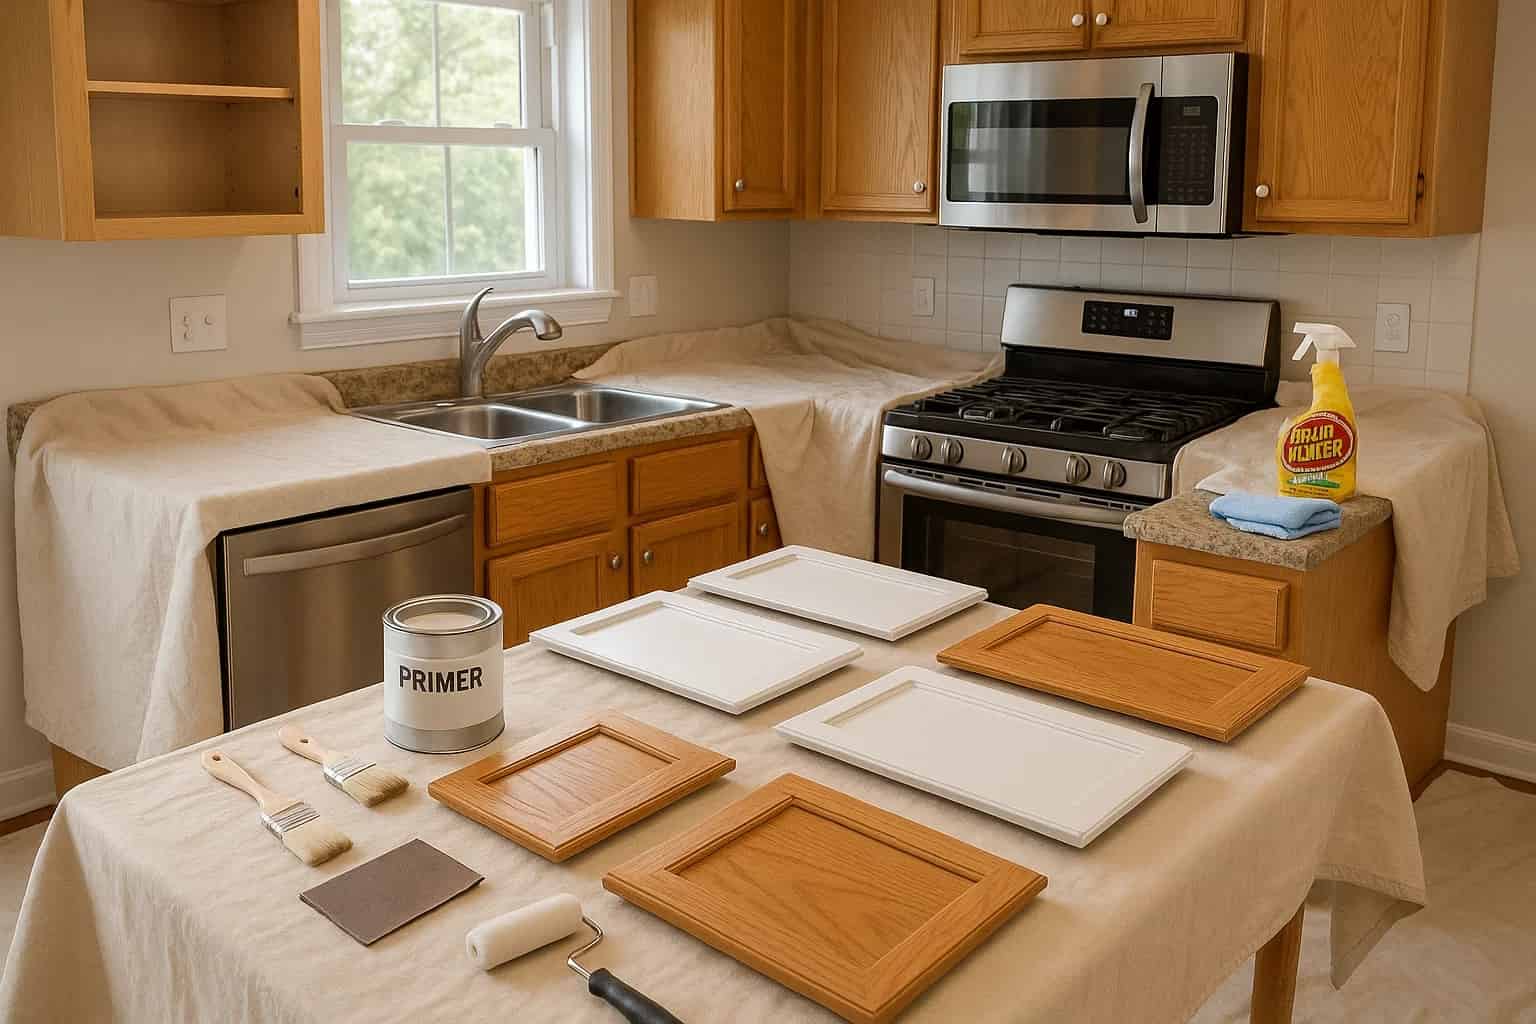
Gathering Your Tools and Materials
Before you begin, it’s essential to gather all the necessary supplies. Having everything on hand will make the process smoother and prevent interruptions. Proper preparation is the key to a flawless finish, and that starts with the right equipment.
You will need:
- High-quality paint (cabinet-specific formula recommended)
- Primer (stain-blocking is ideal)
- Sandpaper (medium and fine grit)
- Painter’s tape
- Drop cloths or plastic sheeting
- Degreasing cleaner
- Screwdriver or drill
- Paint brushes (angled and flat)
- Small foam roller
- Paint trays
- Tack cloth or microfiber cloths
Step 1: Prepare Your Kitchen and Cabinets
Proper prep work is the most critical step in achieving a professional look. Start by clearing your countertops and removing everything from inside the cabinets. Cover countertops, appliances, and the floor with drop cloths or plastic sheeting to protect them from dust and paint.
Next, carefully remove all cabinet doors and drawer fronts. Use a screwdriver or drill to take off hinges, handles, and knobs. It’s a good idea to label each door and its corresponding hardware in small bags to make reassembly much easier later on.
Step 2: Clean and Degrease All Surfaces
Kitchen cabinets accumulate grease, oil, and grime over time, which can prevent paint from adhering properly. You must thoroughly clean all surfaces before you do anything else. A good degreasing cleaner is essential for this step.
Mix a solution of trisodium phosphate (TSP) and water, or use a dedicated cabinet cleaner. Apply the cleaner with a sponge or cloth, scrubbing every surface you plan to paint. This includes the doors, drawer fronts, and cabinet frames. Rinse with a clean, damp cloth and let everything dry completely.
Step 3: Sanding for a Smooth Foundation
Sanding creates a slightly rough surface that helps the primer and paint stick, ensuring a durable finish. You don’t need to strip the old finish completely; a light scuffing is all that’s required for most previously finished cabinets.
The Sanding Process
Using medium-grit sandpaper (120-150 grit), lightly sand all surfaces. The goal is to remove any gloss and create a uniform, matte finish. After sanding, wipe away all dust with a tack cloth or a damp microfiber cloth. Make sure the surfaces are perfectly clean before moving on.
Step 4: Apply the Primer
Primer is crucial for a professional-looking paint job. It blocks stains, prevents bleed-through from wood tannins, and provides a uniform base for your paint. A high-quality, stain-blocking primer is the best choice for kitchen cabinets.
Apply a thin, even coat of primer to all surfaces using a brush for corners and detailed areas and a small foam roller for flat panels. A foam roller helps minimize brush strokes. Let the primer dry completely according to the manufacturer’s instructions, which usually takes a few hours.
Sanding After Priming
Once the primer is dry, lightly sand all surfaces again with fine-grit sandpaper (220 grit). This smooths out any imperfections or raised grain from the primer. Wipe away the dust with a tack cloth before you start painting. This step is key to an ultra-smooth final finish.
Step 5: How to Paint Kitchen Cabinets Like a Pro
Now for the fun part: painting! The type of paint you choose is important. A high-quality acrylic latex enamel or a cabinet-specific paint will provide the best durability against the daily wear and tear of a kitchen environment.
Using a high-quality angled brush, start by painting any detailed areas, corners, and edges. Then, use a small foam roller to apply a thin, even coat to the larger flat surfaces. This combination gives you sharp lines and a smooth, texture-free finish.
Allow the first coat to dry completely. Drying times can vary, so check the paint can for recommendations. Don’t rush this step, as applying a second coat too soon can ruin the finish. Apply a second coat for full coverage and a richer color.
Step 6: Reassemble Your Cabinets
Patience is key. Allow the paint to cure fully before you start reassembling everything. Curing is different from drying—it’s the process of the paint hardening completely. This can take several days, so consult your paint can’s instructions.
Once the paint has cured, you can carefully reattach the hinges, handles, and knobs. Re-hang the cabinet doors and install the drawer fronts. Take your time to ensure everything is aligned correctly. Then, step back and admire your beautifully transformed kitchen.
Maintaining Your Newly Painted Cabinets
To keep your freshly painted cabinets looking their best, a little maintenance goes a long way. Clean up spills and splatters promptly with a soft, damp cloth. For tougher spots, use a mild soap and water solution.
Avoid using harsh or abrasive cleaners, as they can damage the paint finish. Periodically check the hardware to ensure it remains tight. With proper care, your newly painted cabinets will stay beautiful for many years, adding value and style to your home.
Conclusion
Painting your kitchen cabinets is an impactful and budget-friendly way to update your home. While the process requires patience and attention to detail, the stunning results are well worth the effort. By following these steps—from thorough preparation and cleaning to proper sanding and painting techniques—you can achieve a durable, professional-quality finish that completely revitalizes your kitchen. This project empowers you to take control of your home’s aesthetic and create a space you truly love.
We hope this guide on how to paint kitchen cabinets has been helpful. If you’re ready to take on your next DIY project, explore our other articles for more tips and inspiration. Feel free to leave a comment below with any questions or to share your results!
Frequently Asked Questions
What is the best kind of paint for kitchen cabinets?
The best paints are high-quality acrylic latex enamels or paints specifically formulated for cabinets and trim. These provide a hard, durable finish that can withstand the high traffic and cleaning required in a kitchen.
Do I really need to sand my cabinets before painting?
Yes, sanding is a crucial step. It removes the glossy finish from the previous coating and creates a slightly textured surface for the primer and paint to grip onto, ensuring a long-lasting finish.
How long does it take to paint kitchen cabinets?
Plan for at least a full weekend, or spread the work over several days. The process involves many steps with drying and curing time, so it’s important not to rush it for the best results.