
Exterior rubber flooring is transforming outdoor spaces like patios, pool decks, and walkways into safer, more durable, and comfortable areas. Whether you’re a homeowner planning a weekend DIY project or a contractor seeking a reliable surfacing solution, this guide covers everything you need to know. We will explore the different types of exterior rubber flooring, their costs, installation steps, and long-term maintenance. By the end, you’ll understand which product is best for your specific needs and how to get the most out of your investment. This guide is designed to give you the confidence to choose and install the right rubber flooring for any outdoor application.
What is exterior rubber flooring?
Exterior rubber flooring is a resilient surface material specifically engineered to withstand outdoor conditions. Unlike indoor rubber flooring, it contains special additives and binders that protect it from sunlight, moisture, and extreme temperatures. This durability makes it a popular choice for high-traffic areas where safety and longevity are key priorities. At its core, this flooring is made from rubber granules bonded together with a polyurethane-based adhesive. The quality and type of rubber used directly impact the flooring’s performance, appearance, and lifespan. The best outdoor options are designed to prevent fading, cracking, and degradation over time.
SBR, EPDM, recycled rubber — what they mean
The most common materials used in exterior rubber flooring are Styrene-Butadiene Rubber (SBR) and Ethylene Propylene Diene Monomer (EPDM). SBR is typically derived from recycled tires, making it an affordable and eco-friendly choice. It offers excellent durability and impact absorption. However, black SBR can absorb heat and may have a distinct rubber odor initially. EPDM is a synthetic rubber known for its superior color stability and resistance to UV radiation. It comes in a wide array of vibrant colors, making it a premium choice for playgrounds and decorative surfaces where aesthetics are important. Most products use a combination, with a base of recycled SBR for cost-effectiveness and a top layer of EPDM for color and weather resistance.
Understanding these materials is crucial because not all rubber is suitable for outdoor use. For an exterior application, always choose products that specify UV stabilizers. These additives are mixed into the binder or EPDM granules to protect the flooring from the sun’s harsh rays, ensuring the color remains vibrant and the material stays flexible for years. Without them, rubber flooring can become brittle and lose its color quickly.
Types of exterior rubber flooring
Exterior rubber flooring is available in several formats, each designed for different applications and installation preferences. Choosing the right type depends on your project’s scale, the condition of your subfloor, and whether you prefer a DIY or professional installation. From simple interlocking tiles for a quick patio refresh to poured-in-place systems for large commercial areas, there is a solution for nearly any outdoor space. Each type offers a unique combination of aesthetics, installation complexity, and performance characteristics.
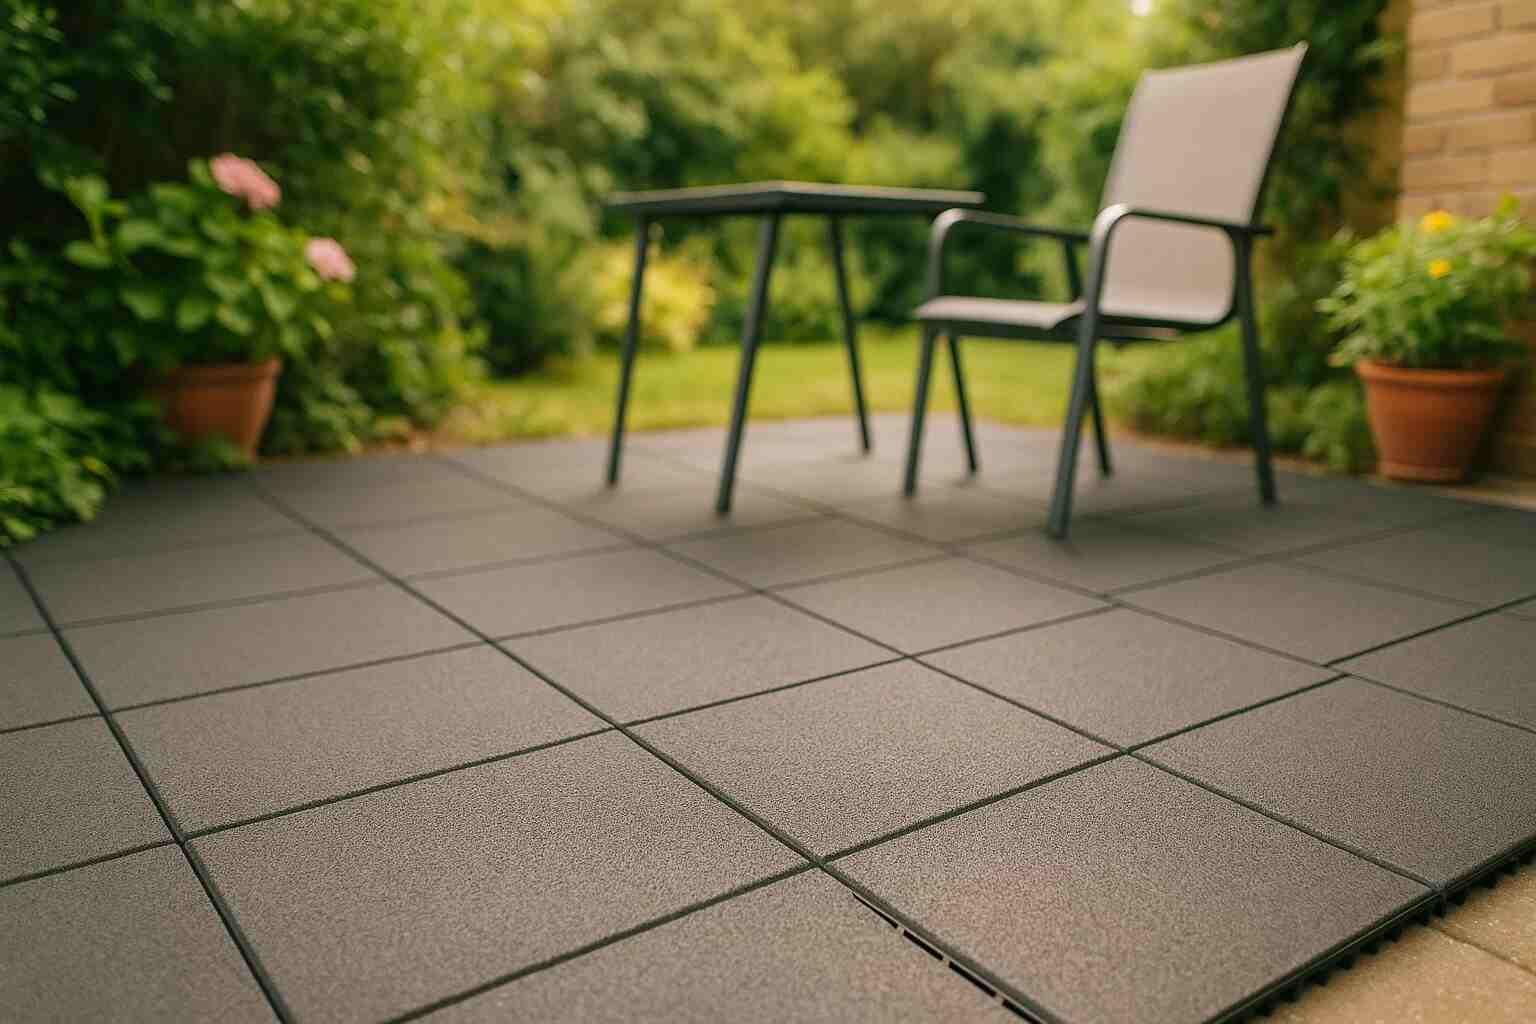
Interlocking tiles (advantages & best uses)
Interlocking rubber tiles are a favorite for DIY enthusiasts. These tiles feature puzzle-like edges that snap together, creating a secure and seemingly seamless surface without the need for adhesive. This dry-lay method makes installation fast and straightforward. The primary advantage is portability and easy replacement; if a tile gets damaged, you can simply lift it out and replace it. They are ideal for patios, rooftop decks, and home gym areas. Many tiles also feature built-in drainage channels on the underside to allow water to flow away, preventing pooling and keeping the surface dry.
Rubber pavers & mats (walkways, commercial)
Rubber pavers are dense, durable blocks designed to mimic the look of traditional brick or stone pavers. They are extremely tough and can handle heavy foot traffic and even light vehicular use in some cases, making them perfect for walkways, driveways, and equestrian facilities. Installation is similar to stone pavers, requiring a compacted base of gravel and sand. Rubber mats are standalone units ideal for smaller, targeted areas like workshop entrances, anti-fatigue stations, or under playground equipment. They provide excellent slip resistance and shock absorption right where you need it most.
Rubber rolls and glued systems (large, seamless areas)
For large, open areas where a seamless finish is desired, rubber rolls are the optimal choice. Typically sold in long rolls that are four feet wide, this flooring is glued down to a concrete or asphalt subfloor. The result is a uniform, professional-looking surface common in commercial fitness centers, large rooftop terraces, and expansive walkways. While the installation is more labor-intensive and often requires professional help to ensure proper adhesion and seamless joints, the finished product is incredibly durable and easy to clean. This system prevents weeds from growing through and eliminates the risk of shifting tiles.
Benefits of exterior rubber flooring
Exterior rubber flooring offers a compelling list of advantages that make it a superior choice for many outdoor applications. Its unique properties address common challenges like safety, durability, and comfort, which traditional materials like concrete or wood often fail to solve. These benefits are a key reason why rubber is increasingly specified for both residential and commercial projects, from pool surrounds to public playgrounds.
One of the most significant benefits is enhanced safety. Rubber is naturally slip-resistant, even when wet. This quality makes it an ideal surface for pool decks, splash pads, and any area prone to moisture. Its inherent shock-absorbent nature also cushions falls, reducing the risk of injury. This is why it is the gold standard for playground surfaces, where it must meet specific fall-height safety ratings.
Durability is another core strength. Made to withstand heavy foot traffic and harsh weather, a high-quality exterior rubber floor can last for a decade or more with minimal maintenance. It resists cracking from freeze-thaw cycles, stands up to UV exposure without significant fading (when properly treated), and is not susceptible to rot or insect damage like wood. Many manufacturers back their products with warranties of five years or longer, attesting to their long-term performance.
Additional benefits include:
- Excellent Drainage: Many rubber tiles and pavers are designed with channels on the underside that allow water to drain away freely, preventing puddles and standing water.
- Sound Absorption: Rubber naturally dampens sound, which is a great benefit for rooftop patios or second-story balconies in multi-family housing, reducing noise transmission to the spaces below.
- Comfort Underfoot: The elastic properties of rubber create a cushioned surface that is more comfortable to stand and walk on for extended periods compared to hard surfaces like concrete or stone.
- Low Maintenance: Unlike wood decks that require regular staining and sealing, rubber flooring generally only needs periodic cleaning with a broom, hose, or mild detergent.
Drawbacks & when NOT to use rubber
Despite its many advantages, exterior rubber flooring is not the perfect solution for every situation. Understanding its limitations is essential for making an informed decision and avoiding potential disappointment. Certain characteristics of rubber can be deal-breakers depending on your climate, aesthetic preferences, and the specific use of the space.
The most notable drawback is heat retention. Dark-colored rubber, especially that made from black SBR, can become very hot when exposed to direct sunlight. This can make the surface uncomfortable to walk on with bare feet, a significant consideration for pool decks and patios in hot climates. While lighter-colored EPDM options absorb less heat, they are more expensive. If your outdoor area is in full sun all day, this is a critical factor to weigh.
Another potential issue is the initial off-gassing odor. Many rubber products, particularly those made from recycled tires, emit a distinct rubber smell when first installed. This odor typically dissipates over a few weeks as the material airs out, but it can be unpleasant in the short term, especially in enclosed or poorly ventilated spaces.
Aesthetics can also be a limitation. While rubber pavers can mimic stone and colored EPDM offers design flexibility, some people simply prefer the natural look of wood or the classic elegance of porcelain tile. Rubber flooring has a more functional or modern appearance that may not align with every architectural style. Lastly, while durable, rubber is not indestructible. It can be damaged by sharp objects like high heels, heavy dropped tools, or metal furniture legs without protective caps.
Feature | Exterior Rubber Flooring | Composite Decking | Porcelain Pavers | Natural Wood |
|---|---|---|---|---|
Pros | Very slip-resistant, shock-absorbent, low maintenance | Low maintenance, fade/stain resistant, no splinters | Very durable, stain-proof, premium look | Natural aesthetic, can be refinished |
Cons | Can get hot, initial odor, can be cut by sharp objects | Can get hot, can be slippery when wet, higher initial cost | High cost, professional installation needed, slippery when wet (unless textured) | High maintenance (staining/sealing), splinters, rot/insects |
How exterior rubber flooring performs in different climates
A key strength of exterior rubber flooring is its resilience across a wide range of weather conditions. However, its performance can vary depending on the specific climate, so it’s important to choose the right product and understand how it will behave in your local environment. From the freezing winters of the north to the scorching summers of the south, rubber adapts well, but there are factors to consider.
Cold climates — what to check (flexibility, freeze concerns)
In regions with significant freeze-thaw cycles, exterior rubber flooring excels where materials like concrete and asphalt often fail. Concrete can crack under the stress of expanding and contracting ice, but rubber remains flexible at low temperatures. This elasticity allows it to accommodate ground movement and temperature fluctuations without breaking. When water penetrates cracks in concrete and freezes, it expands and causes spalling and damage. With interlocking rubber tiles or pavers, water drains away or, if it freezes between the gaps, the tiles have enough give to prevent damage. For glue-down roll applications, it’s crucial to use a flexible, weatherproof adhesive that can move with the rubber to prevent delamination during temperature swings. Look for products with a low-temperature flexibility rating to ensure they won’t become brittle and crack in the cold.
Hot climates — colorfastness and heat absorption
In hot, sunny climates, the two primary concerns are UV degradation and heat absorption. UV resistance is non-negotiable. Sunlight can break down the binders in rubber flooring, causing it to become brittle and fade over time. High-quality exterior rubber products are made with UV-stabilized polyurethane binders and often use EPDM rubber, which is inherently more resistant to sun damage than SBR. Colorfastness is another important consideration. Lighter colors will reflect more sunlight and stay cooler to the touch than dark colors. If your patio or pool deck is in direct sun, choosing a tan, gray, or other light-colored EPDM product will make a significant difference in surface temperature. Black SBR flooring can become uncomfortably hot, so it is best reserved for shaded areas or climates with milder summers.
Cost breakdown — price per sq ft, installed vs DIY, sample budgets
The cost of exterior rubber flooring can vary widely based on the type of product, material quality, and installation method. Understanding these variables will help you budget accurately for your project. The total investment includes not only the material itself but also any necessary base preparation, adhesives, and labor if you choose professional installation.
On average, you can expect the material cost for exterior rubber flooring to range from $3 to $18 per square foot. Interlocking DIY-friendly tiles made from recycled SBR are at the lower end of this spectrum, typically costing between $3 and $8 per square foot. Mid-range options, including thicker tiles and basic rubber pavers, usually fall between $8 and $12 per square foot. Premium products, such as colorful EPDM tiles, thick high-density pavers, and professionally installed roll flooring, can cost $12 to $18 or more per square foot.
Professional installation adds to the overall cost. For interlocking tiles on a prepared surface, labor might be minimal, perhaps $2 to $4 per square foot. However, for glue-down rolls or poured-in-place systems that require extensive subfloor preparation, labor costs can be much higher, ranging from $5 to $10 per square foot. A DIY installation can save you thousands of dollars, but it requires careful site preparation to ensure a lasting result.
Product Tier | Material Cost (per sq ft) | Estimated Pro Install Cost (per sq ft) | Total Installed Cost (per sq ft) |
|---|---|---|---|
Low (DIY Tiles) | $3 – $8 | $2 – $4 | $5 – $12 |
Mid (Pavers/Thick Tiles) | $8 – $12 | $3 – $6 | $11 – $18 |
Premium (EPDM/Rolls) | $12 – $18+ | $5 – $10 | $17 – $28+ |
Sample Budgets (200 sq ft Patio):
- DIY Project (Low-End Tiles): 200 sq ft x $5/sq ft = $1,000 for materials.
- Mid-Range Project (Pavers, DIY): 200 sq ft x $10/sq ft = $2,000 for materials.
- Professionally Installed (Premium Rolls): 200 sq ft x $22/sq ft = $4,400 total.
Step-by-step installation guide (DIY)
Installing interlocking rubber tiles is a manageable DIY project that can transform an outdoor space in a single weekend. The key to a successful, long-lasting installation is proper site preparation. A flat, stable, and well-draining base is essential. This guide focuses on installing interlocking tiles over a solid surface like concrete or a compacted gravel base.
Site Prep: Start by thoroughly cleaning the existing surface. Sweep away all debris, dirt, and leaves. If you are laying over concrete, pressure wash the area to remove any grime or stains. The surface must be as level as possible. Fill any cracks or low spots with a concrete patcher and allow it to cure fully. The surface should have a slight slope (about a 1/4 inch drop per foot) to ensure water drains away from any structures.
Base: For installation over soil, you must create a stable base. Excavate 4-6 inches of soil, lay down a weed barrier, and fill the area with 3-4 inches of crushed stone or gravel. Compact this layer thoroughly with a hand tamper or plate compactor. Top it with a 1-inch layer of coarse sand and level it with a screed board.
Laying Tiles: Start laying your interlocking tiles from one corner of the area, working your way outwards. Connect the tiles by aligning the interlocking tabs and gently stepping on them or using a rubber mallet to secure the connection. Ensure the fit is snug but do not force them, as this can damage the interlocking system. Stagger the joints in a brick-like pattern for a stronger, more stable surface.
Finishing: When you reach the edges of your area, you will likely need to cut tiles to fit. Use a sharp utility knife and a straight edge to score the tile several times, then bend it to snap it cleanly. For thicker tiles, a jigsaw with a medium-toothed blade works best. If your installation requires a border, consider using transition strips or reducer edges for a clean, finished look and to prevent tripping hazards.
Tools & Materials Checklist
- Interlocking Rubber Tiles
- Tape Measure
- Utility Knife & Straight Edge (or Jigsaw)
- Rubber Mallet
- Broom or Leaf Blower
- Level
- For ground installation: Shovel, Wheelbarrow, Weed Barrier, Crushed Gravel, Sand, Hand Tamper
Common Mistakes & Troubleshooting
- Uneven Surface: Tiles rocking or not connecting properly. Stop and re-level the base.
- Gaps Between Tiles: Caused by an uneven base or forcing tiles together. Lift and relay the section.
- Poor Drainage: Water pooling on the surface. Check that the base has an adequate slope. For concrete, ensure drainage channels on tiles are not blocked.
Maintenance & cleaning
One of the most appealing aspects of exterior rubber flooring is its low maintenance requirements. Unlike wood that needs regular sealing or concrete that can stain easily, rubber surfaces are built to endure with minimal effort. Proper care will preserve its appearance, safety features, and extend its lifespan.
Routine maintenance schedule (weekly/seasonal)
For most residential applications, routine cleaning is simple. On a weekly basis, or as needed, use a broom or leaf blower to remove loose dirt, leaves, and other debris. This prevents organic matter from breaking down and potentially staining the surface or clogging drainage channels. For a deeper clean, you can simply hose down the area with water.
On a seasonal basis, or to tackle more stubborn dirt, a more thorough cleaning is recommended. Use a mixture of mild soap or a pH-neutral cleaner and warm water. Apply the solution with a mop or soft-bristled brush, lightly scrubbing the surface to lift grime. Avoid using harsh chemicals, oil-based solvents, or abrasive steel brushes, as they can damage the rubber and polyurethane binder. After scrubbing, rinse the area completely with a hose to remove all soap residue, which can make the surface slippery. For winter care in snowy climates, use plastic shovels to remove snow to avoid gouging the rubber. Avoid salt or chemical de-icers, as they can degrade the material over time.
Repairs — replacing tiles vs patching rolls
Repairs are another area where rubber flooring shines, especially modular systems. If an interlocking tile becomes permanently stained or damaged, the repair is simple. Just lift the single damaged tile out and replace it with a new one. This is a major advantage over monolithic surfaces. It’s always a good idea to order a few extra tiles when you make your initial purchase to ensure you have a color-matched replacement on hand.
Repairing rubber rolls or poured-in-place surfaces is more complex. A small cut or gouge can sometimes be repaired with a polyurethane adhesive or a patch kit from the manufacturer. For larger areas of damage, you may need to cut out the affected section and glue in a new piece. Achieving a seamless look with a patch can be difficult and is often best left to a professional installer to ensure a durable and aesthetically pleasing repair.
Safety & standards
Safety is a primary driver for choosing exterior rubber flooring, especially in areas frequented by children, seniors, or the general public. Its superior slip resistance and shock absorption are measurable qualities governed by industry standards. Understanding these ratings can help you select a product that meets the specific safety requirements for your project, whether it’s a private poolside patio or a public playground.
The slip resistance of a surface is often measured by its coefficient of friction (COF). A higher COF value indicates better traction. The Americans with Disabilities Act (ADA) recommends a static COF of 0.6 for accessible routes and 0.8 for ramps. Most rubber flooring products easily exceed these recommendations, even when wet. This makes rubber an exceptionally safe choice for pool surrounds, splash pads, commercial entryways, and ramps where preventing slips and falls is a top priority. Always check the product’s technical specifications for its specific COF rating to ensure it meets your needs.
For playgrounds and other areas where falls are a risk, shock absorption is the critical safety feature. This is quantified by a fall height rating, which is the maximum height from which a person can fall onto the surface without sustaining a life-threatening head injury. This rating is determined by standards like ASTM F1292. The required fall height rating depends on the height of the playground equipment. For example, if the highest platform on a play structure is 6 feet, the rubber surfacing beneath it must have a fall height rating of at least 6 feet. The thickness of the rubber flooring directly corresponds to its fall height rating—the thicker the material, the more impact it can absorb and the higher the rating. Always ensure the product you choose is certified to meet the safety standards for its intended use.
Eco & sustainability
Sustainability is an increasingly important factor in material selection for building and landscaping projects. Exterior rubber flooring offers a compelling environmental story, primarily through its use of recycled materials. The lifecycle of rubber flooring, from production to disposal, presents several eco-friendly advantages that set it apart from other surfacing options.
Recycled content, embodied carbon, recycling options
The vast majority of exterior rubber flooring is made from recycled rubber, predominantly from post-consumer car and truck tires. Each year, millions of tires reach the end of their life, and turning them into flooring diverts this massive waste stream from landfills. By giving these materials a second life, the industry reduces the need for virgin resources and helps solve a significant disposal problem. A typical 200-square-foot rubber patio could divert dozens of tires from the landfill. This high level of recycled content significantly lowers the embodied carbon of the product, which is the total greenhouse gas emissions generated during manufacturing.
The sustainability benefits extend throughout the product’s lifecycle. Rubber flooring is extremely durable, meaning it needs to be replaced less frequently than other materials, reducing waste over the long term. At the end of its life, some rubber flooring can be recycled again. The material can be ground down and repurposed into new rubber products or used as crumb rubber for athletic fields and other applications. When choosing a product, look for certifications from organizations like GREENGUARD, which tests for low volatile organic compound (VOC) emissions, ensuring better air quality. By opting for flooring made from recycled rubber, you are making a choice that is not only good for your space but also better for the planet.
Comparison: Exterior rubber flooring vs other outdoor surfaces
Choosing the right outdoor surface involves balancing cost, durability, maintenance, safety, and aesthetics. While exterior rubber flooring has many strengths, it’s helpful to see how it stacks up directly against other popular options like composite decking, porcelain pavers, and natural wood. This comparison can help you prioritize what matters most for your project.
Feature | Exterior Rubber Flooring | Composite Decking | Porcelain Pavers | Natural Wood Decking |
|---|---|---|---|---|
Average Cost (Installed) | $5 – $28 / sq ft | $15 – $35 / sq ft | $18 – $40 / sq ft | $15 – $30 / sq ft |
Lifespan | 10 – 20+ years | 25 – 30+ years | 50+ years | 10 – 25 years |
Maintenance | Low (sweep, hose) | Low (wash, no staining) | Very Low (wash, stain-proof) | High (stain/seal every 1-3 years) |
Aesthetics | Functional, modern, colorful | Wood-like appearance | Premium, stone/concrete look | Classic, natural beauty |
Slip Resistance | Excellent, even when wet | Fair (can be slippery) | Fair to Good (depends on texture) | Poor when wet or mossy |
Safety | Superior shock absorption | Hard surface, splinters not an issue | Very hard, unforgiving surface | Can splinter, becomes slippery |
Key Takeaways:
- For Safety and Comfort: Exterior rubber flooring is the clear winner, making it ideal for families with children, pool areas, and anyone prioritizing comfort underfoot.
- For Lowest Maintenance: Porcelain pavers and composite decking are strong contenders, requiring little more than occasional washing. However, rubber is also very low-maintenance.
- For Aesthetics: This is subjective. Natural wood offers timeless beauty, porcelain provides a high-end modern look, and composite mimics wood without the upkeep. Rubber offers a functional aesthetic with color options.
- For Budget: Rubber flooring, especially DIY-friendly tiles, offers one of the most affordable entry points for a durable outdoor surface. Premium porcelain and composite options represent a higher initial investment.
Pros & Cons Summary
When you need a quick overview, this summary distills the key advantages and disadvantages of exterior rubber flooring to help guide your decision.
Pros:
- Superior Safety: Excellent slip resistance and shock absorption reduce the risk of falls and injuries.
- Exceptional Durability: Resistant to weather, cracking, and heavy foot traffic for a long-lasting surface.
- Low Maintenance: Requires only simple cleaning with a broom or hose; no sealing or staining needed.
- DIY-Friendly Installation: Interlocking tiles make it easy for homeowners to install without special tools or adhesives.
- Comfortable: Provides a cushioned surface that is easier on joints than concrete or stone.
- Eco-Friendly: Primarily made from recycled tires, diverting millions of pounds of waste from landfills.
Cons:
- Heat Absorption: Dark colors can get very hot in direct sunlight, making them uncomfortable for bare feet.
- Initial Odor: Recycled rubber products may have a noticeable smell for the first few weeks after installation.
- Susceptible to Punctures: Sharp objects like furniture legs or high heels can cut or gouge the surface.
- Functional Aesthetic: The look may not suit all home styles, particularly those aiming for a traditional or natural appearance.
Considering these points, exterior rubber flooring is an outstanding choice for patios, pool decks, playgrounds, and walkways where safety, durability, and low maintenance are the top priorities.
FAQ
Can rubber flooring be used outdoors?
Yes, but it must be specifically rated for exterior use. Outdoor rubber flooring contains UV inhibitors and weatherproof binders that protect it from sun, rain, and temperature changes, preventing it from cracking, fading, or degrading over time.
How long does exterior rubber flooring last?
A high-quality exterior rubber floor can last 10 to 20 years or even longer. Lifespan depends on factors like the quality of the material (EPDM vs. SBR), thickness, intensity of sun exposure, and the amount of foot traffic it endures.
Are rubber tiles safe around pools?
Absolutely. Rubber tiles are one of the safest options for pool surrounds due to their high slip resistance, even when wet. Many tiles also feature drainage channels that help keep the surface dry and prevent puddles from forming.
How do you install interlocking rubber tiles on a patio?
Installation is simple. First, ensure your concrete patio is clean, level, and sloped for drainage. Then, starting from a corner, lay the tiles and connect them using their built-in interlocking system. Use a rubber mallet to secure the connections and cut tiles to fit at the edges with a utility knife or jigsaw.
Is outdoor rubber flooring waterproof?
Rubber itself is water-resistant, meaning water will not damage the material. However, the system is not always “waterproof” in the sense of creating a sealed barrier. Interlocking tiles are designed to let water drain through the seams and flow away underneath. Glue-down rubber rolls, when properly installed with sealed seams, can create a nearly waterproof surface.
Do rubber floors fade in the sun?
Low-quality rubber floors will fade in the sun. To prevent this, choose exterior-grade rubber flooring that contains UV inhibitors. EPDM rubber is known for its superior colorfastness and is a better choice than standard black SBR for areas with intense sun exposure.
How much does outdoor rubber flooring cost per square foot?
The cost typically ranges from $3 to $18 per square foot for materials alone. DIY-friendly interlocking tiles are on the lower end ($3-$8), while premium EPDM tiles, thick pavers, or professionally installed rubber rolls can cost $12 to $18 or more per square foot.
Conclusion
Exterior rubber flooring offers a modern, practical solution for a wide range of outdoor spaces. Its unparalleled safety features, durability, and low maintenance make it a smart investment for homeowners and property managers alike. Whether you’re creating a safe play area for your children, a comfortable and slip-resistant pool deck, or a durable walkway, there is a rubber flooring product that fits your needs. By weighing the pros and cons—from its shock-absorbent comfort to its potential for heat absorption—you can make a choice that enhances both the function and value of your property.
For the best results, consider these final recommendations:
- For Pool Decks & Playgrounds: Prioritize safety with thick, shock-absorbent EPDM tiles for superior slip resistance and lower heat retention.
- For Patios & DIY Projects: Interlocking SBR or EPDM tiles offer the best balance of cost, ease of installation, and performance.
- For Large Commercial Walkways: Glue-down rubber rolls provide a seamless, heavy-duty surface built for high traffic.
Ready to take the next step? We recommend obtaining a few product samples to see and feel the different textures and colors in your own space. Measure your area carefully, use our cost table to build a budget, and decide whether a DIY or professional installation is right for you. A well-chosen rubber floor will provide you with a safe, comfortable, and beautiful outdoor surface for years to come.
Also Read:
Safe & Durable Exterior Floor Tiles Non Slip B&Q You Can Trus
Safe & Durable Exterior Floor Tiles Non Slip B&Q You Can Trus